social media links

Friday, December 20, 2013

Stuffed Animal Harness - Great Stocking Stuffer

I've mentioned Ozzie the Adventure Kitty a few times lately, so I thought I'd shed a little light on his now famous harness.


We do a lot of hiking and Bean rides along in a backpack on my husband's back.  She wanted to bring her panda with her on a hike one day, but I vetoed that since he is way too big for her to hold onto.  Instead I told her she could bring her Ozzie Kitty.  She wasn't sold on the idea until we called him Ozzie the Adventure Kitty who loved the great outdoors. 


Unfortunately, Ozzie also "loved" jumping up to see the birds, and trees, and plants, and rocks, and well.... you get the picture.  I had to follow behind picking Ozzie up every time he just HAD to see something and he launched himself out of the backpack. 


A harness was the best idea I could come up with the keep him securely attached, yet still give him some freedom to "explore" his surroundings.  I also wanted it to be able to fit some of her other similarly sized stuffed animals in case Ozzie wasn't the only one keen on adventure.


When I made this Baja Hoody I made a bunch of bias tape using this fun mushrooms fabric by Aneela Hoey from A Walk in the Woods.  I used some of the leftovers to construct this super easy harness.  Since this would make a great stocking stuffer I thought I'd make Ozzie a new Christmas harness and post the super easy way I made it.


For a harness that fits a standard Beanie Baby sized animal all you'll need is:
30" bias tape
2 snaps (I used the great Babyville ones I bought for this project)
Carabiner


Start by sewing the bias tape together along the folded edges, turning under the ends as you go, to completely enclose the raw edges.

Fold the bias tape in half and pin 7.5" from the fold.  Stitch a rectangle from the pin, to about 1" from the fold, and then back to the pin. 


Attach the female side of the snaps facing down (as shown in the picture above) at the ends of the harness.  Attach the male side of the snaps facing up at the start of the Y, right below the sewn rectangle.


To put the harness on:

Step 1: start with the Y at the base of the neck
Step 2: flip the animal over, bringing the ends under the arms, crossing in front, and up to the shoulders
Step 3: flip the animal back over and snap the ends to the snaps at the base of the Y
Step 4: rejoice!


Add a carabiner (or another method of securing the harness - a velcro tab would work) and your harness is complete!  Super easy, right? 

If you have a larger or smaller animal the following is how you can customize the harness to fit.
After sewing the binding together to conceal all the raw edges, you will need to wrap the harness around the animal as follows to make sure you have the correct sizing. 


Step 1: fold the bias tape in half, mark the center with a pin, and with the stuffed animal on its back, cross the two ends, making an X
Step 2: flip the animal over and pull the two ends over the shoulder area until they meet the rest of the harness (which wrapped under the arms) at the back
Step 3: squeeze the folded together middle section at the back making sure that the pin you placed in Step 1 is still at the center of the folded end (pin not pictured)
Step 4: Pin the two pieces together where you squeezed.  This pin replaces the 7.5" mark from the rectangle step above.  Proceed with the rest of the instructions as is after sewing your customized rectangle. 

We love Ozzie's little harness. It means he can go a lot of places with us where I would otherwise be too worried about losing him. We just attach him to one of the buttons of her coat and he's good to go.

walking in the snow with daddy

riding on the Santa Train with mama

being coy with pafa

and of course, Ikea
Having Ozzie with her out and about makes her seem more relaxed and he gives her a little more courage.  She has the doctor listen to his heart and then it's not quite so scary when she has to have her own listened to too.  She brings him to story time and she's less shy and wants to tell people about her kitty.  If we don't have him with us now, and someone talks to her while we're out, she'll say Ozzie is in the jeep, hehe. 

Next time you have some leftover bias tape, you should try making one of your own.  It makes a great (easy!) last minute addition to a stuffed animal gift.

As usual, linking up to:

The Chicken Chick Shaffer Sisters encourage. inspire. uplift. create. Photobucket I Made That Thursday! Get Your Crap Together Photobucket

Wednesday, December 18, 2013

Fabulously Festive - Glitter Toms

This month's Jo-Ann Fabrics Celebrate the Season theme is Fabulously Festive.  I thought it was the perfect theme for a craft I've been meaning to do since Halloween.  This is a sponsored post, but all opinions are mine.

I broke down and bought a pair of Toms this summer and they quickly became my favorite go-to shoes.  The light grey was perfect for summer, but I they didn't translate well to fall and winter.  Then after the pouring rain and muddy mess of Halloween night, they didn't look so great so I decided to buy a new pair for the winter months.  After seeing some fun fabric glitter from JoAnn I thought I could try altering them myself before buying a whole new pair. 


So here is what I started with.  Even after a good cleaning they look dingy, right?  I scrubbed them up pretty good, but now you see why I planned to buy a new pair.  The good news is that this would work even on a new or gently worn pair of fabric shoes so you don't have to wait until yours are at this stage, hehe.


The supplies you'll need to make your own are:

Martha Stewart Crafts Fabric Medium
acrylic paint
Tulip Glitter Fabric Spray Paint (just look at all of those fun colors!)
paint brush
painter's tape (not pictured)
fray check (optional)


My first step was to fix a small tear that had formed on the side of one shoe, but if yours are already good to go you can skip ahead to the "start." 


Since the tear didn't go through to the inside of the shoe, I used some Fray Check to prevent the tear from getting any worse, which should keep everything together for a while.  I was concerned how well the paint and glitter would cover the Fray Checked area, but it worked a treat.  I would definitely recommend this method if you have any fraying on your shoe.


To start make sure your shoes are washed clean of all dirt and fully dried.  Using painter's tape which is easily removed, tape all the spots you don't want covered in paint (or glitter).  Since the inside of my shoes were already worn, I wasn't too worried about paint getting to the spots that wouldn't be seen once I had them on.  If yours are newer I would recommend filling the space with tissue or newspaper.


1.  Mix your paint with the Fabric Medium according to the bottle directions.  Paint the entire shoe being careful not to miss any spots.  Since you are painting on fabric, some of the paint will absorb immediately so make sure you wait a minute and check for any tiny spots that need another drop of paint.

2.  Allow your shoes to dry at least 8 hours.  The bottle recommends 24 hours, but since we have another step, the 8 hour window is enough.

3.  Using a bottle of the Glitter Fabric Spray Paint spray the entire shoe.  For this step I did use some tissue on the inside because I wasn't sure if the glitter would stick to my feet later (spoiler alert: it wouldn't!).

4.  Heavily soak the shoe with the Glitter Fabric Spray Paint.  At this point I was nervous that these would turn out a gloopy gloppy mess, but I wanted them fully covered so I sprayed and sprayed.


Wait another 8 hours and check to see if the shoes are dry to the touch.  If they are, then it's a good time to remove the tape.  If you wait too long to remove the tape it can dry into the paint which makes it really tough to remove without damaging the painted area, so you want to remove it even if it's a little tacky still.  Once the tape is fully removed, let the shoes dry completely.  Since the Fabric Medium says to heat set the paint once dry, I put the shoes in a pillow case and ran them through a hot dryer.  You could try an iron with a pressing cloth if you are worried about your shoes shrinking in the dryer.  Mine turned out great.


Tada!  It's hard to picture just how sparkly and wonderful these shoes are, but you'll have to trust me.  I am completely in love with my new Festive Toms.  The black paint shows through enough to make the silver glitter really stand out.  And all of the paint and glitter glue seemed to incorporate into the fabric because there is no stiff paint feeling at all.  Seriously.  These nicely worn in Toms feel exactly the same as they did before I started.  It's kind of magical.


And the best part?  The glitter stays put!  These are my hands after pulling off all of the tape which meant I was rubbing them all over the glittery spots.  Absolutely not a speck of glitter.  I'm pretty shocked actually. 


Look at how great these shoes are now!  From completely trashable to fun and festive.


I have pretty much not taken them off since I finished them last week.  They aren't the smartest snow shoes, but they sure are pretty, hehe.


If you want to make some of your own (think really fun little girl holiday shoes!!) you can use this coupon to get 50% off through December 31st.  I've known for a while how great the Martha Stewart Fabric Medium works, but this Tulip Fabric Glitter Spray Paint is my new favorite.


And for other Fabulously Festive inspiration check out JoAnn's Simply Creative Christmas catalog or visit the Celebrate the Season page.  You can also look for the hashtag #fabulouslyfestive to find this and other projects on Twitter, Pinterest, Instagram, and Facebook.

Tuesday, December 17, 2013

Paisley Roots' a Giving Christmas

Today I'm over at Paisley Roots for Karly's fun series A Giving Christmas. 


Karly is an old bloggy friend of mine and I'm excited to see her compete in the upcoming Project Run & Play season which starts in January!  Come see what Bean and I created to help share the spirit of the season.

Monday, December 9, 2013

Christmas Dress - Amaryllis Dress Pattern Review

When Melissa of Melly Sews and Blank Slate Patterns (*affiliate link) asked for testers for a twirly holiday dress I was so excited to be included.  The Amaryllis Dress is the perfect special occasion dress. 


There are two layers that wrap around the body making a really unique and fun shape.  The inner dress covers the front and wraps around the back where it snaps together.  That skirt portion is gathered for some fullness.


The outer dress covers the back and then wraps to the front and ties together with a big bow.  The skirt portion is a full circle skirt so there is a big twirl factor. 


There is also an option to add a tulle layer between the skirts which would make the whole thing even more precious.


It is fully reversible so you can use a fun or more casual fabric on one side, while the other can have a fancy fabric for a special event.  That adds so much wear to one dress which is a huge bonus when you're used to spending the time and effort creating a one-time use garment. 


As usual, Melissa does a great job walking you through the pattern step by step with lots of pictures to help you along the way.  It is surprisingly simple to put together for an intermediate level project.  In my opinion the most difficult part is hemming the circle skirt, but that's just the nature of a circle hemline.  Lots of spray starch and pressing make even the most slippery fabrics workable.  The satin I used was a bear, but the starch really made a huge difference. 

The Amaryllis Dress was a part of the winter Pattern Anthology collection, but it is now available to purchase on its own.  Melissa is doing a sew along this week so grab your copy here (*affiliate link) and go read the kick off post.  I'm sure she'll have more great tips to help you out with any tricky steps.


I paired the dress with a Ruffled Cardigan (*affiliate link) which is also reversible. I used white microfleece for one side and pieces of an old pink sweater that I think was handmade at some point. I wore it for years and I don't even know exactly where it came from. Maybe it was my older sister's at some point and she knows who made it? It had a mysterious coffee-colored stain on the front so I haven't been able to wear it in ages, but I thought it would make a great warm layer for Bean's new Ruffled Cardigan.


Using the pink and white pallet means it should be wearable for any Valentine's day festivities too. I knew it would be worn with the Amaryllis dress so I thought two bows might be a little over the top. I used a simple hook and eye to keep the cardigan closed, but a cute Bow Belt works well too. You can see my other Ruffled Cardigans here.


I am completely in love with this pattern and will absolutely make it again.  Any little girl that loves to twirl will LOVE this dress.  Bean is not quite into the twirling skirt thing yet, but she does say she looks like Cinderella when she wears it, hehe.

Wednesday, December 4, 2013

Coloring Skirt - Handmade Christmas

Ikea has this great home decor weight fabric that is popping up all over the place on the internet these days.  I saw it the last time we were at Ikea and had to get a couple of yards to play with.  Since it's a little heavier than a quilting cotton, it works great as a bottom weight.


Recently Bean had a birthday party to go to and I thought a fun gift for the three year old girl would be a washable Coloring Skirt.  I think it would make a great Christmas gift too. 


I made a simple two layered skirt with the inside layer hanging down about and inch and a half further to give a pop of color to the black and white top layer.  There are lots of tutorials for making a basic skirt online so I won't go into all the details, but if you're looking for a specific pattern you could use the Boardwalk Skirt (*affiliate link) by Andrea Pannell - it has a two layer option.


Personally, I think it looks great as is, but I know it'll be a lot more fun for the kids to color on it.  Throw in a pack of WASHABLE markers and the gift is complete. 


I did a sample run where I colored on a swatch and all but the red and purple marks were completely gone after one washing with no pretreatment.  I use all natural laundry detergent with no additives, so I'm sure using a "normal" detergent would get it completely removed.  My suggestion would be to pretreat it if you are concerned about it.

I have a few other handmade Christmas ideas so I'll be back soon to share.  Can you believe it's December already??

Thursday, November 28, 2013

Easiest Pumpkin Puree - Happy Thanksgiving

In honor of the holiday here in the US, I am posting my super easy cheater method for pumpkin puree.


Seriously guys, this is the easiest thing in the world.  You basically just take a whole squash (in this case a pumpkin), roast it in the oven, and then scoop out the already soft flesh.  So much simpler than trying to cut open a hard skinned squash and deal with it raw.


Step 1: wash your pumpkin (you don't know where it's been, hehe), dry it, and put it on a cookie sheet.

Step 2: put it in an oven preheated to 390 degrees for about 1 hour and 10 minutes.  You can try pricking the skin with a fork to make sure it will go through the flesh to make sure it's done.


Step 3: look at your shriveled pumpkin while you take it out of the oven and let it cool until it's ok for you to handle.  I usually leave it about 15 or 20 minutes so the flesh is still warm.

Step 4: slice the pumpkin in half.  This is the easiest part since the knife cuts through like butter.


Step 5: scoop out the seeds and bits of stringy flesh.

Step 6: since the flesh is already cooked, the strings mostly melt away when you strain the seeds with water.

Step 7: pick out the larger pieces of pumpkin strings left over. 

Now you have lovely pumpkin seeds without making a huge mess of raw pumpkin stringy goo all over the place.  These seeds are now ready for roasting if you'd like.


Step 8: scoop out the soft pumpkin flesh from the skin.

Step 9: the pumpkin comes out super soft and is easily mashable in this state.

Step 10: if you want it extra smooth you can run the puree through the food processor.

This is how I make all my winter squashes.  With Bean, we did baby-led weaning and I made all her "baby" food so for us winter squash and sweet potato were staples.  Being able to just throw a whole squash or potato in the oven without fussing with a knife or peeling the skin made it so easy. 

But I have to say, now I'm most excited about how easily the seeds clean up.  I really dislike all the pumpkin goo and having to run my fingers through to get out all the seeds is not my idea of fun.  Since the goo has been roasted inside the pumpkin already, it is soft and practically dissolves in the strainer which is so helpful.  I hope this little tip works for you too!

https://www.e-junkie.com/ecom/gb.php?cl=190243&c=ib&aff=243407

Also, I should let you know about a couple of pattern sales going on right now:

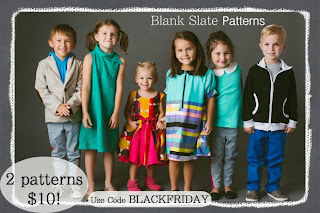
Blank Slate Patterns (*affiliate link) is having a sale through the end of day on Friday.  They don't have sales very often, so you should consider taking advantage of this one.  Use the coupon code BLACKFRIDAY to get two patterns for just $10!

Go To Patterns (*affiliate link) is taking 25% off of Andrea Pannell's patterns through December 2nd as well as a couple of other coupon codes you can check out here.

I hope you all have a Happy Thanksgiving!!

Sunday, November 24, 2013

Reversible Table Quilt

I know you've all been eagerly anticipating this month's JoAnn Fabrics' #turkeytablescapes post topic which I alluded to last month - How To Make a Reversible Table Quilt - so lets get right to it!


This is a sponsored post, but as always ALL opinions are mine.

First, what is a table quilt?  No, I'm not talking about a table runner or a mini quilt that you put in the center of your table as decoration.  My definition of a table quilt is a lightly padded quilt that fits snugly on your expensive dining table in the room where your toddler spends 90% of her time to protect the table from being destroyed by said toddler.


The table quilt needs to wrap around the edges of the table to protect the edges, but also so that it will not be able to be pulled off by grabbing the edge of the quilt.  I didn't want to use straps to hold it in place because Bean also spends a lot of time UNDER the table where she would quickly figure out how to undo the straps.


While I was making our bed one day I realized that I needed something that would work like a fitted sheet for a mattress.  Snug on top with nice looking corners, but held in place by elastic underneath.  Once the idea was in my head I couldn't get it out and I've been dreaming of a table quilt ever since.  By making mine reversible, I was able to get some fun Halloween decorating involved on one side, while still having a great looking fall/Thanksgiving themed look on the other side which really extends its wear. 


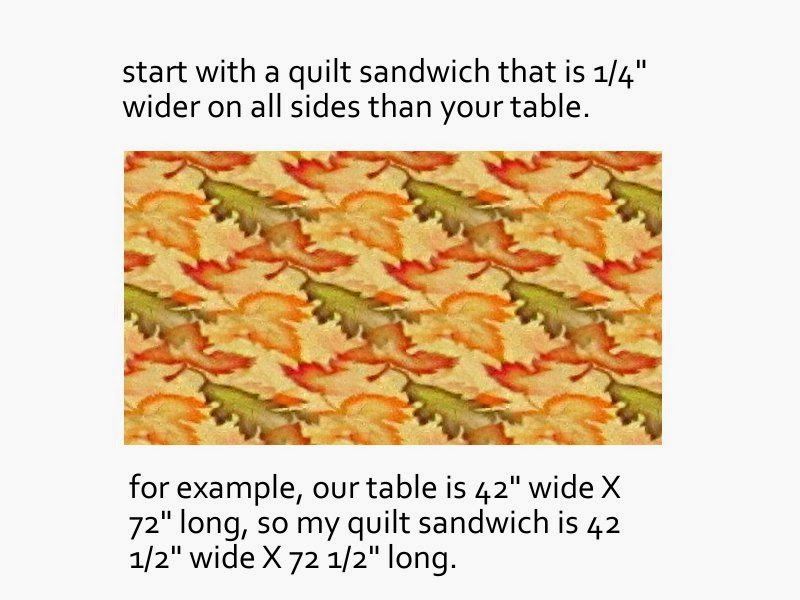
You could easily make your own reversible table quilt with just two fabrics you like quilted together (or some of the fun pre-quilted fabrics) instead of the elaborate Halloween quilt top pattern I put together.  The Thanksgiving side of the quilt is very simple (I treated it like a backing) and it still looks great.  Below are the instructions for making a basic reversible table quilt using your own rectangular table's dimensions.

You will need the following:

a quilt sandwich - bottom and top with some sort of batting between, quilted together.
coordinating strips for binding with batting attached to the wrong side.
1/4" elastic
your table dimensions


Sew all four corners together:


Fold the binding in toward the edge of the quilt and hand stitch in place.  Leave about a 3inch opening so you can fit the elastic through later.


Machine stitch about 1/2inch from the folded edge, leaving another 3inch opening.


Using a safety pin, thread the elastic through the outside casing and sew the ends together.


Stitch both of the openings closed, adjust the elastic so it's somewhat evenly dispersed, put your table quilt on your table, and admire.


For more fun holiday ideas, check out JoAnn Fabrics Celebrate the Season site or look through their craft catalog.  Use the coupon above to get 50% off through the 30th of November.