social media links

Friday, January 18, 2013

Polka Stripes

I really stretched myself this week for Project Run & Play's polka dots and stripes week. I haven't had a ton of "from scratch" inspiration lately, but of course this (BUSY) week is when it hit. 

I so loved LBG Studio's look from week one and I knew I had to bag what I had already planned and start over.  And by "start over" I mean in my head because of course I hadn't actually started drafting, cutting out, or sewing anything yet.  I merely had a plan of what I would make and which fabrics I would use.  All that however, was tossed away.  I'm so glad too.

I decided to make a jumper that I've had in my head for a while, but with bubble shorts instead of a skirt.  The bubble shorts/tights is what most inspired me from the LBG look.  That being thought, I had no bubble shorts from which to draw from, so I started drafting. 


From that came tiny pin pleats in front and back and a little gathered edge on the outside leg.  I sewed a home made bias tape band around the legs to keep everything tidy.  I also made the bubble extra big because Bean wears cloth diapers and when she moves around I wanted it to remain comfortable.

For weeks I've been dreaming up a jumper that has a top shape similar to the middle section of the Maggie Mae Tunic from Shwin Designs.  I made one of these in December and fell in love with the pattern.  I really wanted to see the shape in jumper form. 


So I adjusted the basic middle bodice pattern and created a lining.  I added button holes to the front and straps in between the exterior and lining in the back to create the jumper.  I also used some interfacing just to make sure the buttons in front didn't make the whole thing sag.


Coordinating pink polka dot fabric covered buttons (I'm OBSESSED) completed the look.  I am so pleased with how this first try came out.  I definitely want to add ruffles to the top of the straps next time.  This may sound odd, but trust me it'll be sooo cute, hehe.


And since this was polka dots AND stripes week I whipped up a shirt.  The fabric is from one of my favorite old knit shirts.  It was just is a little too short to be age appropriate for me these days, so I made the sacrifice to make something adorable for Bean.


The fabric was just horizontal stripes, but I wanted something different so I took the top of the bodice and created a chevron with the stripes.  I then just took the bodice bottom (original hem) and gathered it a bit in front and back, added sleeves (kept the original cuffs), added a different color pink neckline, and voila!  Quick refashion.  It had to be quick because I was down to the wire with the rest of the sewing this week, hehe.


Speaking of quick, I made a pair of leggings this morning in the same color I used for the neckline of the shirt.  I dreamed last night that this would tie everything together.  At least they look comfy with the top.  I might be going insane, hehe.
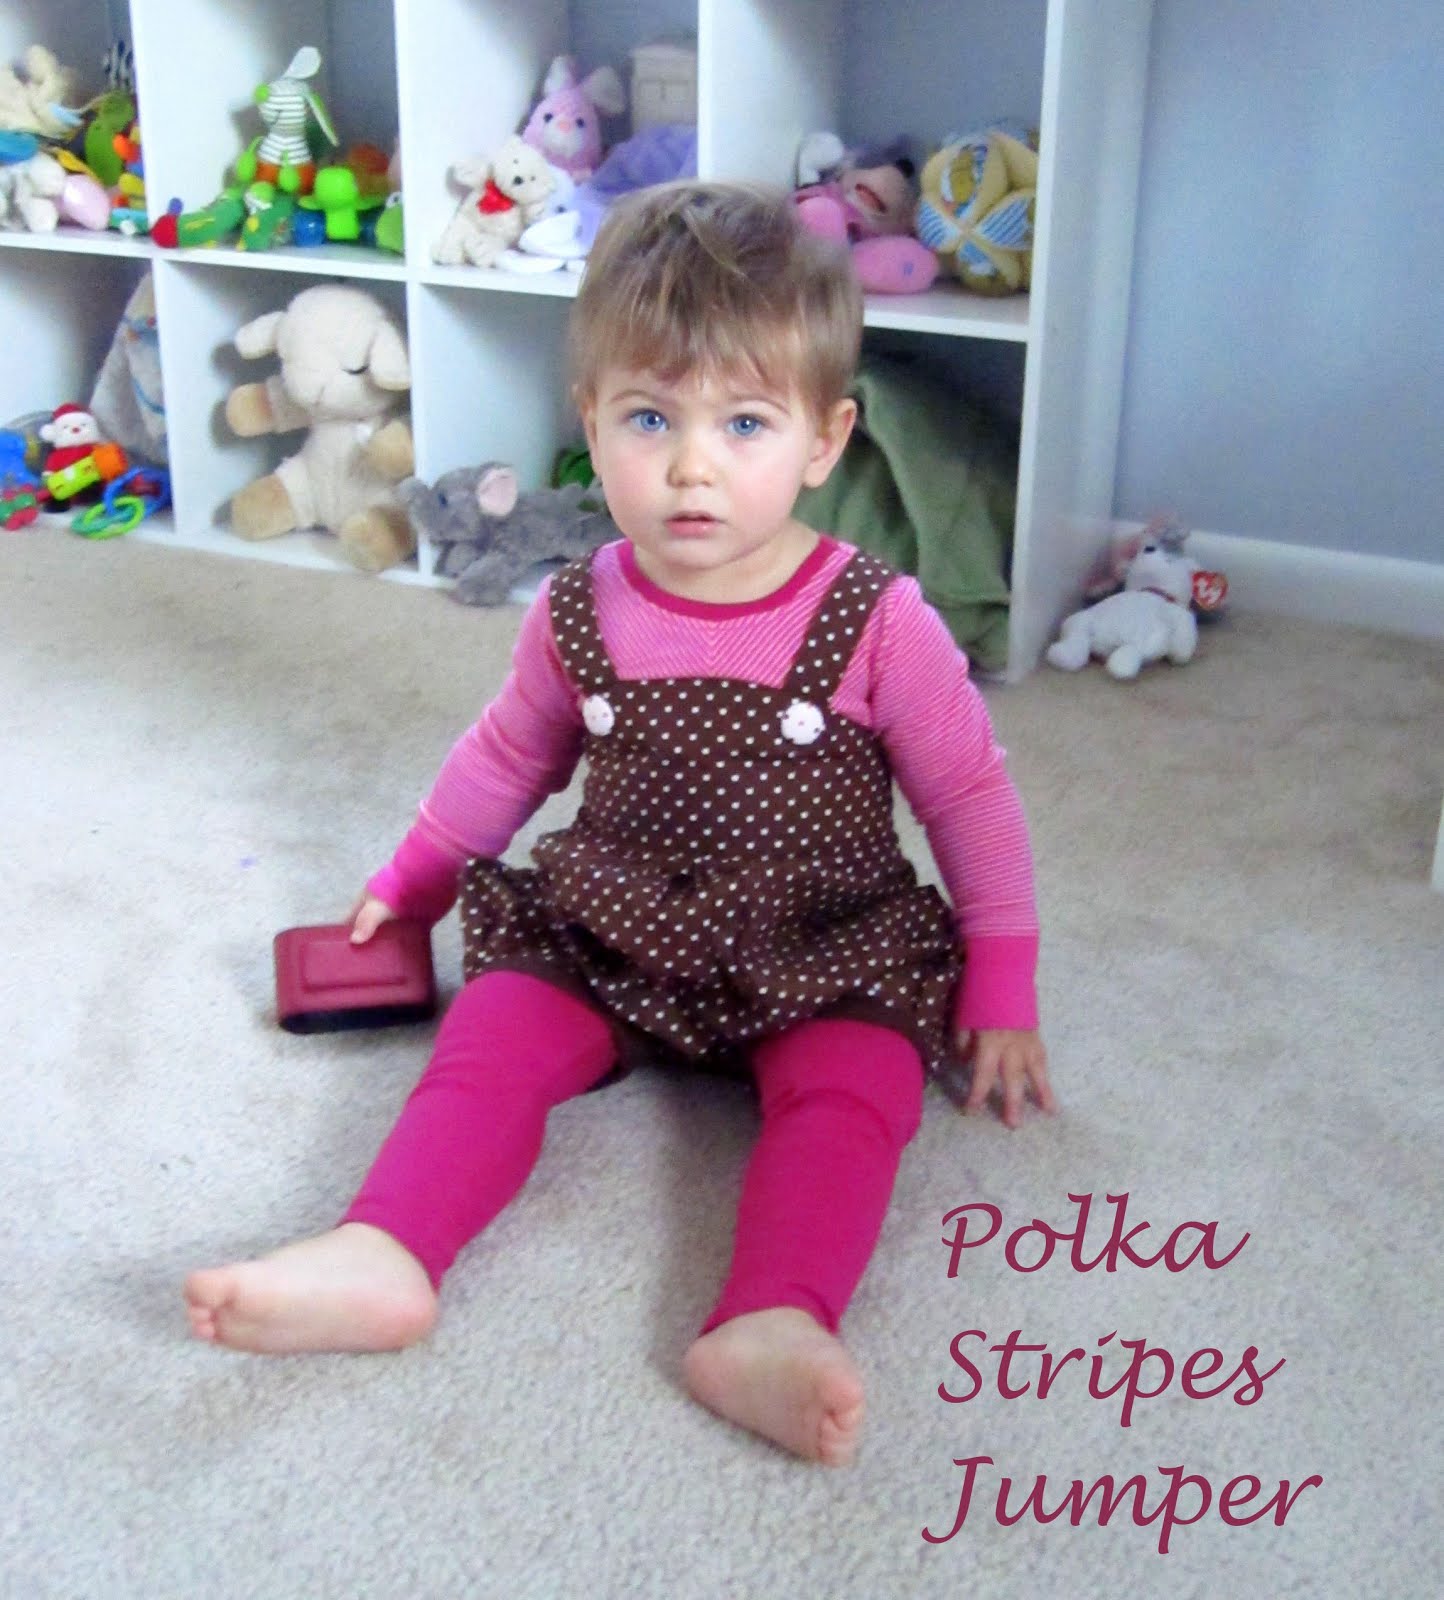


Yeah, she's not supposed to have that camera case.  But it made her hold (almost) still for a second so...


Here you can see there is plenty of room for her cloth diapered booty, hehe.  Also, I didn't plan on the polka dot sheets being on the crib for these photos, but I have loved how they look with the striped crib rail protector I made so I have them on there A LOT.  I guess this stripes and polka dot thing was meant to be, hehe.


**update: This was featured on Shaffer Sisters!

Shaffer Sisters encourage. inspire. uplift. create.


As usual, linking up to:

I Heart Nap Time Sew Chatty Photobucket Happy Hour Projects


Tuesday, January 15, 2013

Elephants and Ruffles

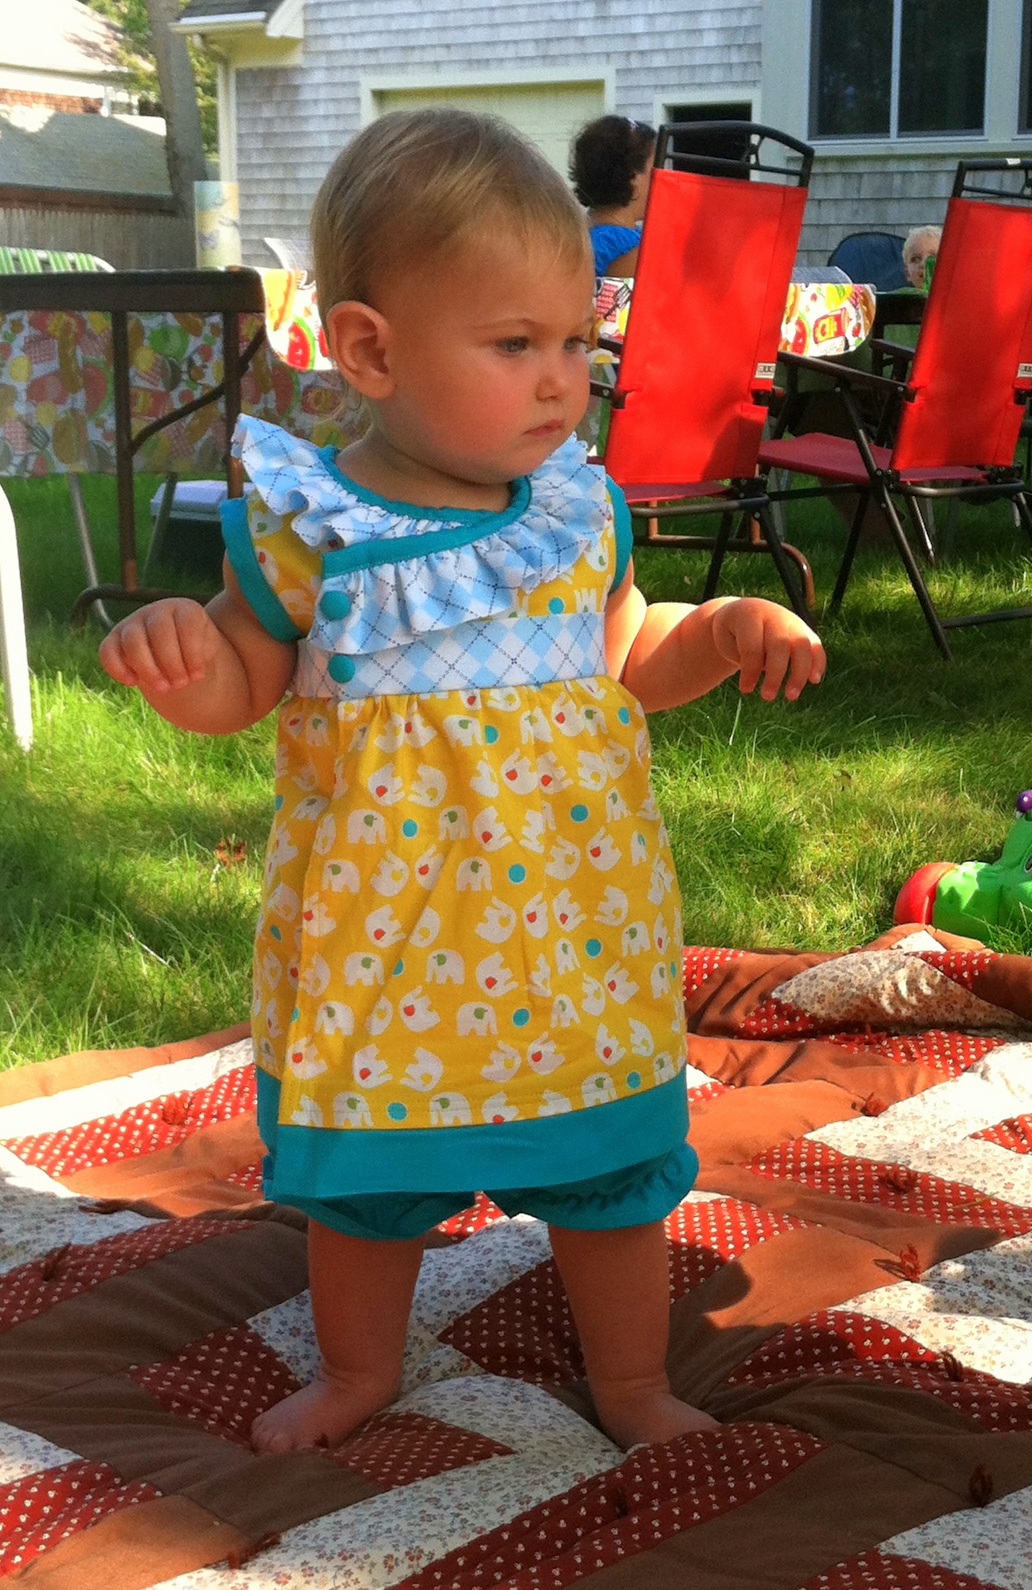
This past August (yes, five months ago!) I made a dress for Bean to wear to our family BBQ.  I've been meaning to post the pictures here and since the previous elephant dress post got lots of color combo praise I figured it was time. 


I knew it needed lots of ruffles and mixed patterned fabrics.  At the time I was interested in seeing how mismatched patterns would look once put together.  The argyle fabric I instantly fell in love with.  And who doesn't love elephants?  Then to tie them together I found a linen-ish green-ish blue solid color which matched one of the ball colors in the elephant fabric.  I almost used the orange elephant fabric for this dress, but last minute thought the yellow was more summery.  Now that I've see both fabrics in use I am definitely happy with the decision.  I love both combos, but they have a seasonal feel to me that seems to work.

Once I figured out the fabrics I wanted to work with, I went looking for inspiration.  I found it (and a tutorial!) in the Madelyn Dress.  I loved the look right away.  The wrap with ruffles is adorable and I thought it would work well with my fabrics. 


I didn't really use the tutorial since some of the ways she sewed it together didn't make sense in my brain, but it came out almost exactly the same.  The only real thing I changed was the length.  I like Bean's dresses a little shorter.


I thought it would be cute with a pair of bloomers so I just used an old bloomer pattern I drafted and added ruffles.  My favorite is the elastic ruffle at the leg.  I love this look!  Will she be too old to wear this type of thing next summer at two years old?  I hope not.


This is a picture I took at the BBQ.  Look how young she looks, hehe.  She had just started taking a few steps and you can tell she's unsure of her skills by her arms in this pic.  I put this outfit back on her yesterday and it still fits, but you see WAY more of the bloomers now - like a shorts and shirt outfit.


We also had the opportunity in September to meet with Kelly Crawford for a photo session.  I was VERY excited about this, because I have followed her blog (sewing in no man's land) for so long and I adore her photos.  She has a way of capturing eyes and expressions that I think is so lovely. 

At the very end of the session Kelly saw that I had brought this little outfit and said we HAD to get some pics of Bean wearing it.  It was hot and Bean was getting a little tired, but she did a great job and Kelly got some amazing pictures. We love hiking so the session was set up at a trail head nearby.  Bean was not actually hiking, though it kind of looks like she's been out walking in a fancy outfit for hours hehe.  I will leave you with two shots from the session that I just adore. 

 
As usual, linking up to:

I Heart Nap Time Sew Chatty Photobucket Happy Hour Projects


Thursday, January 10, 2013

Season Six!

Project Run & Play season six is in full swing!  I'm excited because this season they have decided to make the sew along at home competition a Linky Party (found at the link above) instead of just the flickr group.  With the Linky it'll be easier to see everyone's entries and get to their blog posts with one click. 

This (first) week we were supposed to remix The Cottage Home's Party Dress.  I think this dress is adorable and would make one as is if it were warmer weather around here right now.  Alas, I knew I'd want to make one with long sleeves.  Since I have an obsession with the comfort of knit fabrics lately, that's where I ended up for inspiration.


I changed the top quite a bit, but used the original pattern for the bodice at its base.  Instead of sewing the bodice and lining together as suggested, I sewed the shoulder seams together for each of the two bodices (exterior and lining).  Then I sewed the bodices together at the sides and along the entire neck. 


I didn't worry about the button loops since I had already decided I'd sew in button holes (you can see above that I used a bit of interfacing to make it sturdy at the button placket).  I trimmed the seams and snipped the curves and turned the whole thing right side out. 


Keep in mind that there are two arm holes and the bottom edge that are unsewn at this point.  I sewed two long sleeves and inserted them into the arm holes making sure that the exterior and lining bodices were held together as one piece, then sewed exterior holes facing the right side of the sleeves.


Once I had pressed with my iron, I then top stitched along the outside edge of the bodice. I agree with The Cottage Home's tutorial that a top stitch gives a more professional look. 


Instead of the button loops I made button holes for a more stable button placket.  I was mostly worried the knit would sag with just the loops.  I do also like how simple the placket looks with the small buttons running down the back.


I shortened the skirt length as this will mostly be worn as a tunic with leggings since we don't have any real parties to attend in the near future, hehe.  However, I kept the skirt band and tie the same size which gives them an oversized look that's fun. 


Speaking of fun, it really is impossible to get pictures of Bean these days.  She can hardly sit still.  The lighting was terrible too, but mostly these are blurry cause she was moving, hehe.


Standing in front of the mirror is one of the only ways to get her to be still.  Of course, ten seconds later she was pulling the skirt portion up over her head to see how funny it would look in the mirror.


Above, she clearly found something on the carpet to inspect.  Probably a piece of fuzz.  She picks up fuzz in the house and hands it to me as if to say "please vacuum more often." 

The following pics are of Bean being very silly.


Thanks to The Cottage Home for the inspiration for this Elephant Party Dress!


As usual, linking up to:
I Heart Nap Time Sew Chatty Photobucket Happy Hour Projects


Monday, January 7, 2013

Christmas Pajamas 2012

I know, I know.... WAY too late for Christmas posts, right? Well I promise this is still relevant.

It was the day before we were to leave for our Christmas trip up north and I had been sewing late (LATE) nights the whole week getting ready for presents and some winter Bean clothes, when I realized that I hadn't made any Christmas PJs for her. Yikes!

I had no ideas and no chance to get to the fabric store so it was going to have to be something I could whip up quickly with what I had. I have a legging pattern that I drafted a while back which has been a big savings. It's a little crazy how easy it is to make a pair of leggings. I can make three or four pair (including the fabric cutting!) in a short Bean nap. And that's if I don't use my serger. So I thought I could alter the pattern a bit to make some cute Christmas bottoms. There are lots of tutorials out there for making leggings - Made by Rae comes to mind first - so I won't go into that here. What I did to change them up was to sew together the back pieces first and then sew ruffles on the bum.  Not entirely original (doesn't EVERYONE do ruffles on the bum, hehe), but I love the look.


I also widened the leg at the bottom a bit and made a little cuff with the same fabric I used for the ruffles. 

Once I knew I wanted to do a legging bottom, I thought I'd use knit fabric for the top to keep everything comfy cosy.  The problem was that I didn't have any cute Christmasy knit fabric on hand.  So I turned to the Go To Signature Dress pattern and made some changes to fit with the fabrics I had.

The Signature Dress is a great pattern that allows for many different lengths, styles, sleeve types, and other modifications, but it is meant to be used with stretchy knits.  I wanted to use the cute fabric I had used for the ruffles and cuffs on the leggings, but that is quilting cotton. 

So I decided to make the sleeves and collar out of the white knit fabric and the rest of the dress (with an additional flutter sleeve) out of the green Christmasy cotton fabric. 


The "dress" is the tunic length with no elastic or shirring at the waist or chest. The only issue with using the quilting cotton is that the Signature Dress uses the stretchiness of the knit fabric to go over the head and even with the knit collar, the cotton doesn't budge enough to fit.

So (and here is where this Christmas-heavy post finally gets relevant, hehe) I used the existing shoulder seam to sew in a mini snap placket.


It opens just enough to get Bean's head through and when closed is hardly noticeable.  I used this collar method to make another quilting cotton Signature top that I love.  I think it's a great addition to an already handy pattern to own!


And of course the obligatory Bean photos.  Keep in mind that she moves so quickly these days that it's tough to get a good non-blurry picture of her:

Christmas morning
front view (slightly blurry)
here you can see the placket

The last pic cracks me up.  Bean has spent the last two days playing IN our stool/end table. 

Finally, the new season of Project Run & Play starts today.  I'm very excited!  Off to the cutting table (read: kitchen counter) I go!

As usual, linking up to:

I Heart Nap Time Sew Chatty Photobucket Happy Hour Projects