


If you remember, I used this type of smocking on the Bean Bishop dress, the Smocked Top, and Bean's Birthday dress. Below are two close up reminders of how the front and back turn out.
 |
| 1/2" grid |
 |
| 1/4" grid |
To start out (and to make sense of those last two captions), you map out a grid of dots on the back of the fabric. Lattice smocking is worked from the wrong side as opposed to other types of smocking - primarily honeycomb. Decide how far apart you want the stitches to be. A good measurement would be 1/4 to 1/2 inch apart. I've grown to like the 1/2" grid since it comes together a lot quicker, but the 1/4" is really pretty once it's finished.

Using a fabric marker (something that will disappear or not leave a permanent mark) make a grid of dots 1/2" apart across the smocking area. Move your ruler down 1/2" and make another row of dots just like the first row.
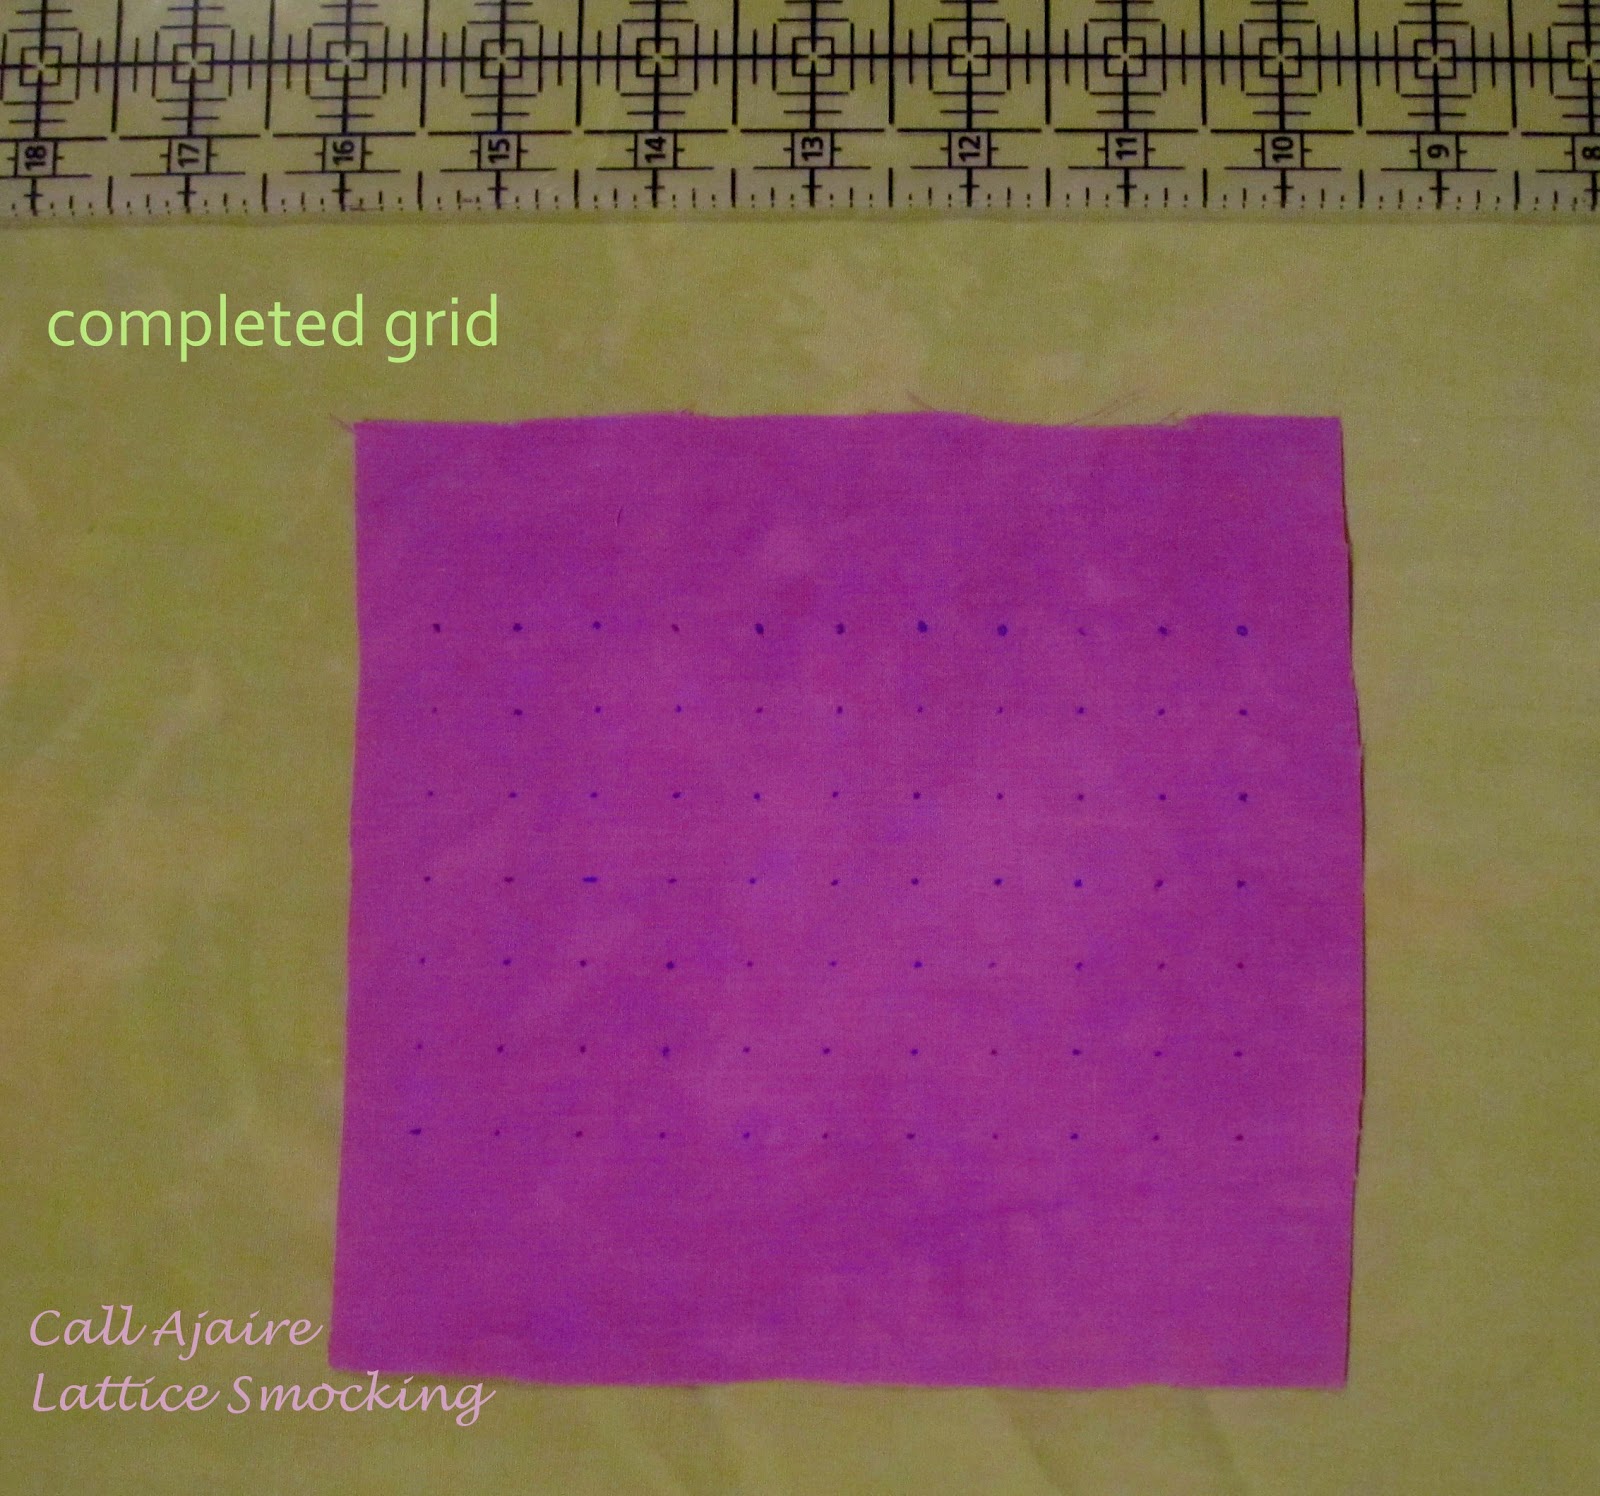
Continue making rows until you've completely covered the area you'd like to smock. Keep in mind that the smocking will shrink the width and the length of the fabric once it's complete. So take that shrinkage into account when you measure your original piece of fabric.

Draw hash marks down each column, skipping a dot in between each mark. Alternate the direction and stagger the hash marks at each column. In the picture above you can see where I started with my fabric marker and then continued another two columns with digital lines a little brighter for this tutorial. It will look like a sort of herringbone pattern when complete.

To start smocking, it's easier to imagine the dots are lettered. In the picture above you'll see upper case and lower case letters. Starting at the upper case A, secure your thread by picking up a couple of stitches and using an embroidery knot.

The basic idea to create the smocking is to join two dots together across the diagonal, following the hash marks. In the picture above you'll see arrows along the hash marks indicating in which direction to find the corresponding dot. You will always start at the lower dot and connect the upper dot by pulling the fabric down toward the lower dot.

Once the thread is secure at the upper case A, pick up a stitch at the lower case a.

Connect the two dots buy pulling the thread toward the upper case dot. I've found it helps to pinch the fabric perpendicular to the hash mark a bit at the lower case dot before pulling the thread tight. Stitch through the connected dots twice to secure the thread before proceeding down to the next hash mark.

Pick up a stitch at the upper case B dot and stitch a second stitch to secure. Leave slack in the thread between the Aa hash mark and the Bb hash mark so the fabric will have some stretch once smocked, but not so much that the threads are dangling. Pick up a stitch at the lower case b and prepare to pull the dot down toward the upper case B.

Pull the thread between the B and b bringing the lower case toward the upper case. Again, you can pinch the fabric where the letters meet before you do the securing stitches.

Continue to smock downward, matching the upper case with their lower case counterparts through Ff.

Now you are going to jump over to the right to the upper case G dot. Secure the thread making sure to leave some slack as you would for any upper case dot. Proceed as normal (catch some stitches at g and then pull the fabric toward G and secure the smock) except you'll be going up the column this time.

This is a good time to mention that you want to be sure you're not catching too much of the fabric when you catch a few stitches. You will also want to use a like colored thread (I didn't for the example) so that if a few stitches show on the other side (usually just the very edge might not be covered) they won't stand out as much as they do on the front side of the fabric as in the picture above.

Now that the first column has been completed, it becomes a little more obvious why you went through the effort of marking the hashes before you started. As you can see in the picture above, the matching dots start to bend with the smocking so they may be hard to locate. By following the hash mark you can easily locate which dots to connect. It may be helpful to push aside a previous smock in order to find the matching dots as with the lower case dot in the picture above.

Once you've smocked your way to the top of this column, you then jump over to the upper case M dot, again leaving some slack in the thread. This column starts the beginning of the pattern again. You will continue to smock downward the same way you did the column starting with Aa. Again, you can see that the lower case o and lower case q are located a bit under the previous smocking, but they are easy to find by following the hash mark. Just pull the smocking aside to grab the stitches at their dots.


I realize that with all of these pictures it must seem impossibly hard, but trust me when I say it looks so much more complicated than it is. Once you get going, the rhythm makes perfect sense and you can just breeze through it. The tricky parts are the ends of the columns and remembering which dot to attack next. But it's totally doable. I only included so many pictures as a reference in case you get stuck in similar spots as I did.
Hopefully you'll try some lattice smocking yourself and I hope you'll share the results with me. I'd also be happy to help out with any questions you may have. I am guest posting at Project Run & Play today where I give some tips for using lattice smocking as a bodice detail.
Happy smocking!!
Hopefully you'll try some lattice smocking yourself and I hope you'll share the results with me. I'd also be happy to help out with any questions you may have. I am guest posting at Project Run & Play today where I give some tips for using lattice smocking as a bodice detail.
Happy smocking!!
I would love to do it! Looks complicated though! :)
ReplyDeleteYay - glad you finally posted this! Pinning.
ReplyDeleteSo smocking newbie question- is there a preferred fabric type for this? I know the birthday dress is a knit yes?
ReplyDeleteKilling me with cuteness! Love can't wait to try it out. My be filling your inbox with questions!
ReplyDeleteGreat tutorial! I have wanted to try this type of smocking, but was intimidated. This is very clear. Thanks!
ReplyDeleteSo cool!! Smocking is so beautiful - I've never tried it, but you make it look doable!!
ReplyDeleteI am now going to go Smock All The Things.
ReplyDeleteI don't know that I've ever seen a clearer set of instructions on smocking.
Thank you!
What a great tutorial.......Thank you for sharing with the Clever Chicks Blog Hop this week; I hope you’ll join us again!
ReplyDeleteCheers,
Kathy Shea Mormino
The Chicken Chick
http://www.The-Chicken-Chick.com
oh my gosh this is amazing!
ReplyDelete